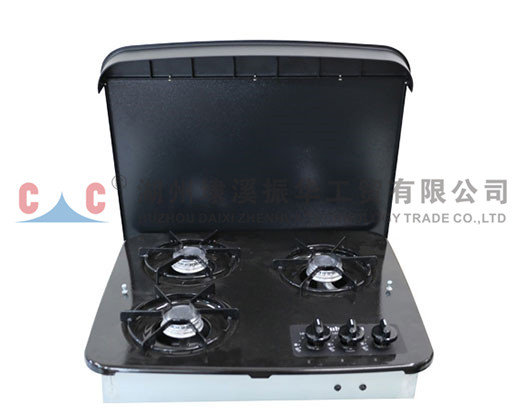
A reliable RV burner is the cornerstone of the mobile kitchen, transforming stored propane into controllable heat for cooking. Its operation hinges on a simple yet precisely engineered system. Liquid propane, stored under pressure in the RV's tank, travels through a network of copper or flexible lines. A crucial component, the regulator, reduces this high pressure to a safe, usable level for your appliances. When you turn the stove knob, you open a valve that allows this low-pressure gas to flow into the burner tube. Simultaneously, you activate an ignition source—either a piezoelectric sparker or an electric igniter powered by your RV's battery. This spark ignites the gas-air mixture as it exits through small ports in the burner head, creating the familiar ring of blue flame. Understanding this flow from tank to flame is the first step in safe operation, effective troubleshooting, and informed maintenance of your entire cooking system.
Few things are more frustrating on the road than a stove that won't light. When you face an RV propane stove burner not lighting, a systematic approach is far more effective than random guesses. The issue typically falls into one of three categories: no gas flow, no spark, or a blockage. Starting with the simplest and safest checks can often resolve the problem quickly without the need for tools or complex repairs. Before beginning any troubleshooting, always ensure the area is well-ventilated and that you do not smell gas. If you do smell gas, shut off the main tank valve immediately and do not attempt to use any electrical switches or igniters.
Follow this logical sequence to identify the culprit:
Regular maintenance is the key to preventing most common burner problems and ensuring efficient, safe operation for years. Learning how to clean and maintain RV cooktop burners is a fundamental skill for every RVer. Spills, grease splatter, and food debris can clog gas ports, interfere with ignition, and create uneven flames. A clean burner not only performs better but is also safer, as blockages can cause gas to flow improperly or flames to burn where they shouldn't. Establishing a simple post-trip and deep-seasonal cleaning routine will save you from future troubleshooting headaches.
When cleaning and basic fixes are not enough, you have clear paths forward: exact repair or functional upgrade. The choice often depends on the age of your stove, the availability of parts, and your desired cooking performance.
If a burner head is cracked or corroded beyond repair, you'll need a replacement burner for Suburban or Atwood RV stove or another brand. The process is straightforward but requires precision.
For enthusiasts who do a lot of cooking or need to boil water quickly in all conditions, a high output RV stove burner for camping can be a game-changer. These burners, often rated at 12,000 BTUs or more compared to a standard 8,000 BTU, provide faster heating and better performance in windy outdoor conditions or at high altitudes.
| Aspect | Standard Burner (~8,000 BTU) | High-Output Burner (12,000+ BTU) |
| Boiling Time | Standard; adequate for most routine cooking. | Significantly faster; ideal for boiling large pots of water for pasta or group meals. |
| Fuel Consumption | Lower per hour of use. | Higher per hour, but tasks are completed faster, potentially netting similar total consumption. |
| Compatibility | Original equipment for most stoves. | May require verifying fit with your specific stove model and adequate ventilation. |
| Best For | Everyday cooking, couples or small families. | Serious camp cooks, large group feeding, and high-altitude camping. |
The traditional RV burner now has a high-tech competitor. The debate between an RV induction cooktop vs propane burner comparison is a major trend in RV modernization. Induction cooking uses electromagnetic energy to heat the cookware itself, not the cooktop surface, offering a fundamentally different experience. This isn't just a minor upgrade; it's a choice between two different energy philosophies for your RV lifestyle, with significant implications for power usage, safety, and cooking style.
Induction offers incredible speed, precise temperature control, and a cool-to-the-touch surface, enhancing safety, especially while moving. However, it demands a substantial amount of 120-volt AC electricity, requiring a robust inverter and battery bank or a reliable shore power connection. Propane, on the other hand, is the king of energy independence ("boondocking"), providing high heat output with minimal drain on your electrical system, though it involves an open flame and combustion gases.
No, it is strongly discouraged and considered unsafe. An open flame in a moving vehicle is a significant fire hazard. Sudden stops, turns, or accidents could cause pots to slide off, spilling hot contents or creating a fire. Furthermore, using propane appliances while in motion may be against your RV insurance policy terms. All propane appliances should be turned off, and the main tank valve should be closed during transit for maximum safety.
A yellow, sooty, or flame that lifts off the ports indicates an improper air-to-fuel mixture. The most common cause is a clogged burner orifice or ports, restricting gas flow and disrupting the mix. Another cause could be low gas pressure from a failing regulator or an nearly empty tank. Finally, check the air shutter adjustment near the base of the burner; it may need to be opened slightly to allow more primary air in for a cleaner, blue, and stable flame.
Absolutely. Wind is the enemy of an open flame's efficiency. The most effective solution is a simple windscreen. You can purchase folding metal windscreens designed for camp stoves or create a temporary one with aluminum foil or a pot lid. Placing it strategically to block the prevailing wind around your stove can drastically reduce heat loss and fuel consumption, making cooking outdoors much faster and more pleasant.
A failing regulator often reveals itself through inconsistent burner performance. Key signs include:
Search
Search for products that you are interested in.
Company

 Privacy